This blog post will summarize how to bake a fully furnished scene with lights onto a texture.
The foundation of this entire process is a finished scene that we want to bake. In the example scene used in this post, there is a room with various objects: chairs, tables, benches, lamps, etc. We add lights to this room within Blender so that when we import it into any other engine later on, we don’t have to deal with any additional post-lighting.
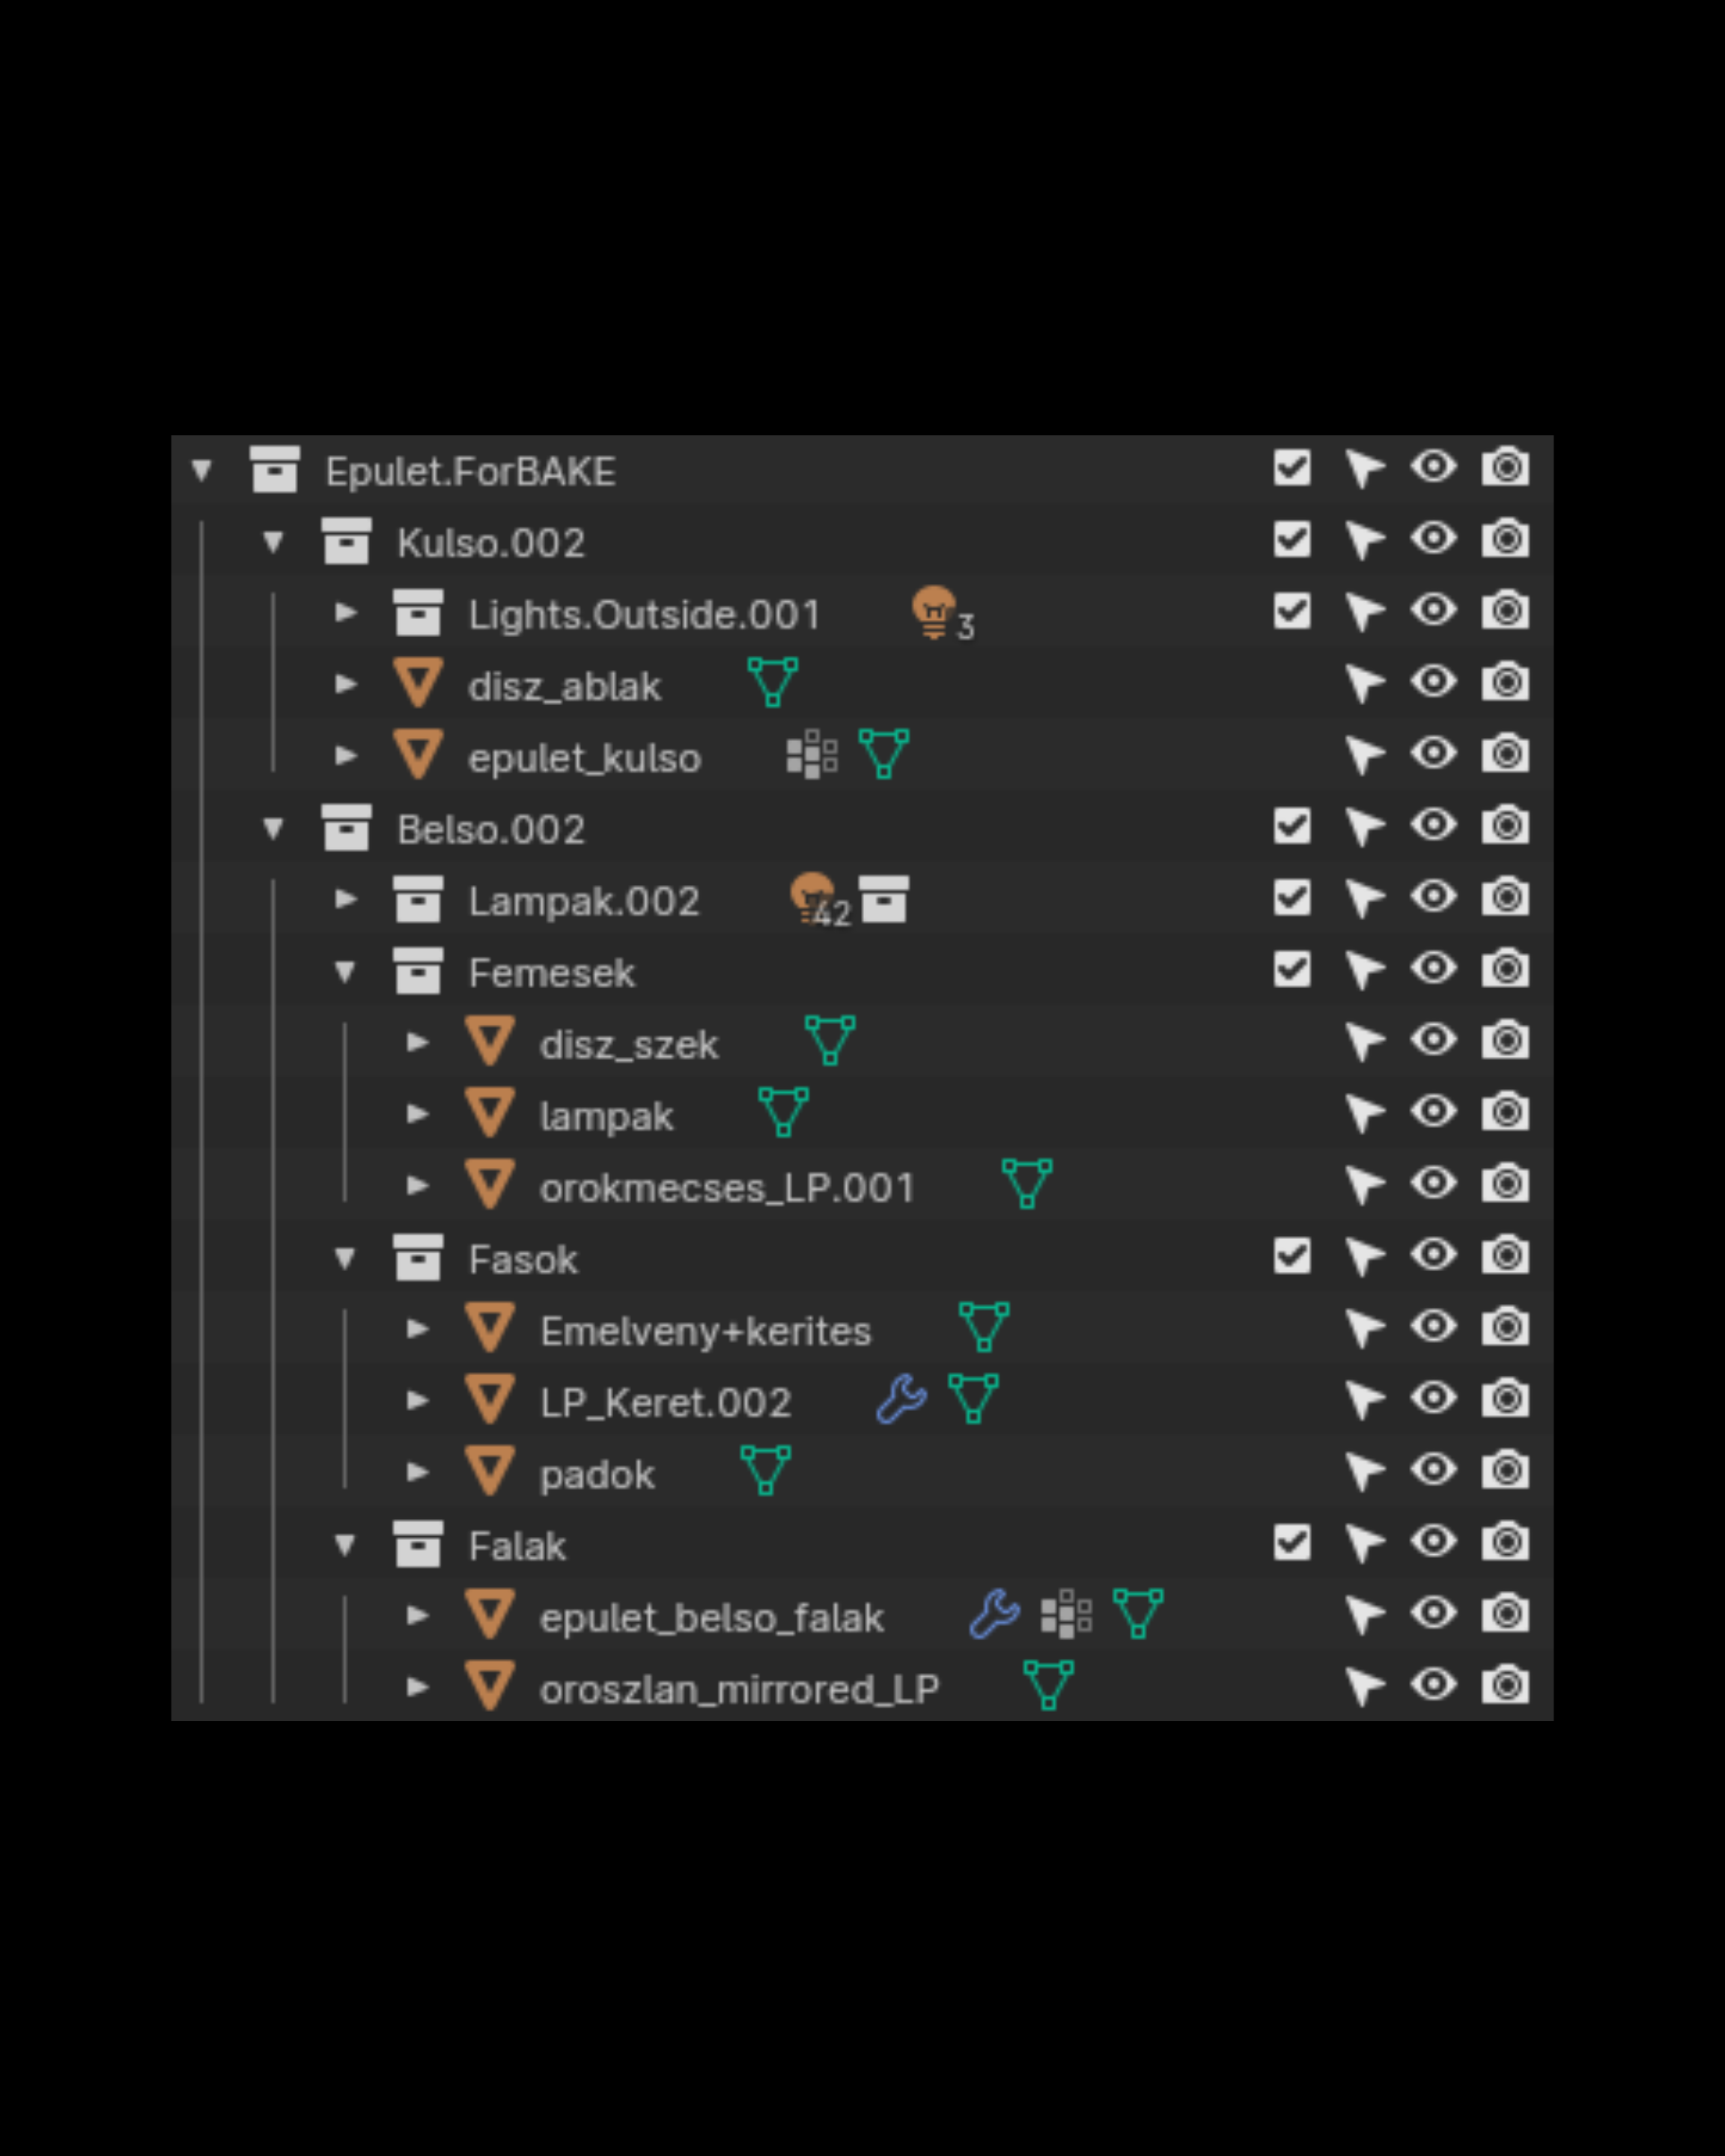
Since a room can contain many objects, each with different material slots and textures, and sometimes multiple instances of a particular object are placed at different points, our first task is to arrange and organize the scene. Initially, it's best to duplicate the entire scene or perhaps the entire project file so that if we make a mistake somewhere, we have an original version we can refer to and use to correct any errors.
Our main goal is to reduce the number of textures on the objects in the scene to as few as possible (for optimization purposes). Among these textures, the lights of the scene should also be baked onto the diffuse map. To achieve this, it's best to group the objects found in the scene into main categories. Let's consider one group = one material → 3 - 6 texture maps, depending on whether metallic, emission, or alpha maps are needed. It's worth considering that when grouping if, for example, multiple objects have metallic maps, it's advisable to collect them into a separate group, similar to those having alpha maps or emissions. The basic, fixed 3 maps are diffuse, roughness, and normal.
When grouping, we must ensure that objects with metal or metallic elements are placed into one group. It's also better to put the elements of the room - such as walls, floors, ceilings, windows, or items on the wall (such as a painting or a storage shelf) - into a separate group. We do this mainly because we have large, contiguous surfaces that take up a lot of space on the UV map. The third group can include other objects: benches, tables, and smaller items. Of course, if a scene contains many more objects, it's worth subdividing it further, because if there are too many elements placed on one UV map, details can get lost, and the quality of the final result becomes very poor.
Applying modifications
Here, we'd like to focus a bit on what to pay attention to before grouping.
In the case of frequently repeated objects, mirror, array, or linked copies of objects may occur, or combinations thereof, such as linked objects with a mirror. These modifications must be applied before joining any two objects together. Then we have to apply the scale and rotation and check that the normal directions are correct. (If we fail to apply the modifications we won’t be able to unwrap the UV map of the object correctly) Finally, in edit mode, we have to check for overlapping.
We also need to check if there's auto-smooth on the given object, and if so, what degree the normal is set to. Because if this value differs across objects within a group, and we join them the appearance of some objects will change, which may differ from the desired outcome. In such cases, we have to avoid merging those objects.
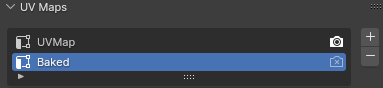
It's also important that each object's base UV has the same name (e.g., BaseUV) because after merging, we can only select one UV to bake from. If the names don’t match, we won't get the desired result after baking.
![]()
Joining
Once everything is in order, modifiers, and scales are all applied, it's worth joining the respective groups into one object. This makes it easier for us to understand the groups and makes baking more efficient, as it bakes everything at once, which might result in a slightly faster rendering time, not object by object. However, if auto-smooth is applied (mentioned above) we may need to exclude some elements from the merge to achieve the desired result. In such cases, we need to be careful not to leave anything out of the bake.
We need to create a new UV for the merged and intentionally left-out objects, onto which we will bake. After creating it, we immediately go into edit mode (and make sure that the left-out object is selected too), select everything, and unwrap a new UV. This will be the basis for our re-baked texture.
Preparation of Materials
Next comes the "harder" part, which is not getting lost among the many elements. What do we mean exactly?
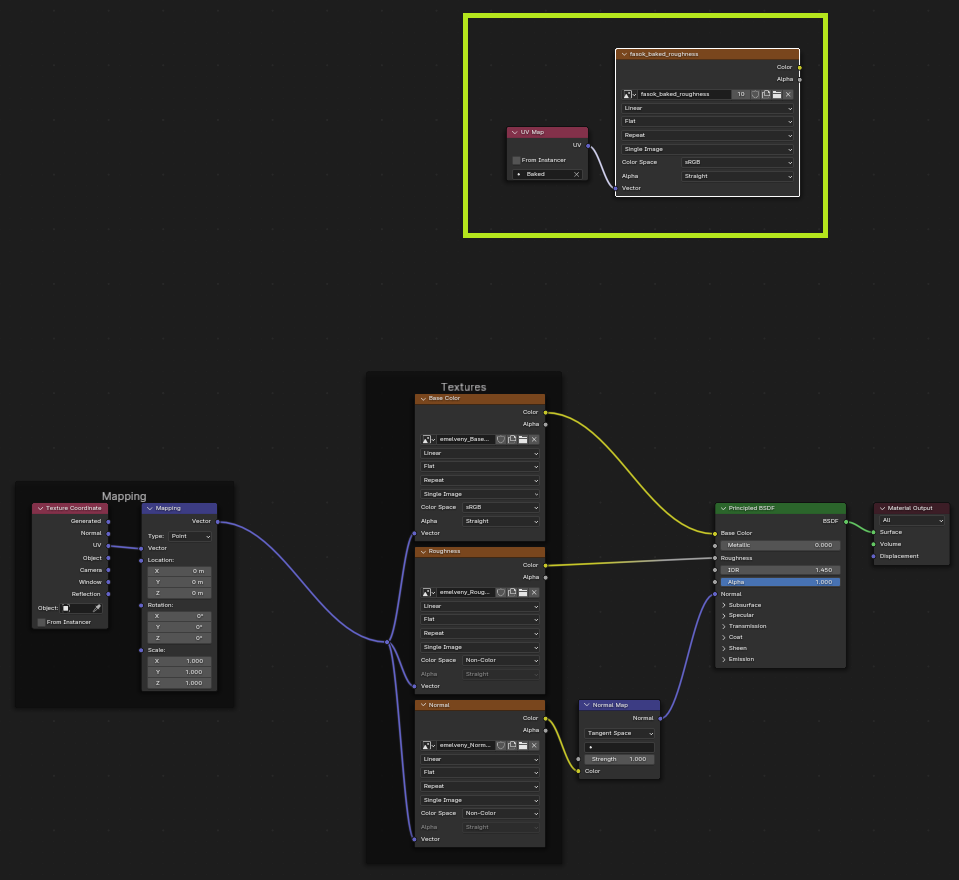
After joining the elements into one object, all the materials used on that object will be on the merged object. Here, we need to create an image node in each material used on the object, containing the image file onto which we will bake. The cleanest way to do this is to create the image node in the first material listed, and also connect a UV node in it, where we select the UV onto which we want to bake.
Then we select these two nodes and copy them into every material slot of the merged object. It's important to note that if any of the slots are left out, our original textures will be overwritten during baking, which we definitely don't want. After pasting, select the new image node, as baking is always carried out on the active node (this is also true for every material slot, the new image node needs to be active everywhere).
Once the new image is included in every material where we want to bake, we need to select the newly created UV as well. Ensure that the new one is active, and selected, but only the visibility of the old UV should be turned on, as we are baking what is visible on the old UV onto the (new) active one.
Baking
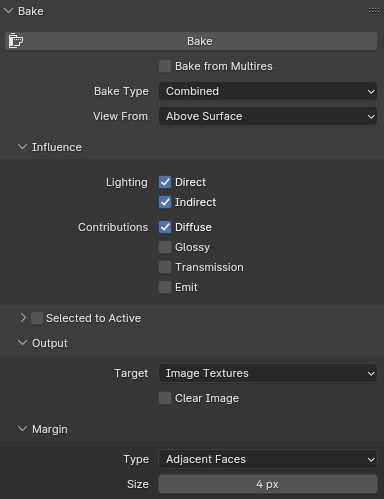
We found it’s best to start with the diffuse, as we also want to bake lights. It's useful to start with this because sometimes, after baking, the lighting result can be quite different from what we see in the viewport in render mode. It's better to bake diffuse first, check if all the lights are appearing correctly, and then proceed to normal, roughness, and others if necessary.
In the case of diffuse, we prefer to choose the combined option in the bake list instead of the diffuse option, as in our experience we get a noisy image back if we bake with the basic diffuse setting. When using the combined mode, uncheck all options except for direct, indirect lighting, and diffuse, as only these are needed. This way, we are baking basically with the same process as if we were choosing the diffuse option directly, but in this case, the result won't be noisy.
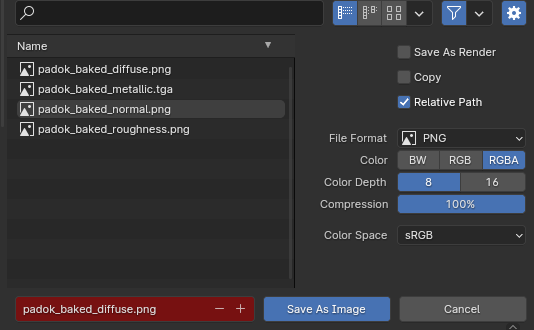
Once we've baked our diffuse map, let’s check to make sure that everything is correct. If not, adjust as needed (e.g., lights). If everything looks good, save the image file, and move on to the normal map.
When saving, choose the ‘save as’ option, as intentionally, we only created one image node in each material slot to avoid confusion, so we don't have to go through every material for each map and switch to the desired image node. However, since we have only one node, if we constantly press save after each bake, we would overwrite the previously baked map every time. After each bake, choose save as, then save the image under a new name indicating which map we have baked (diffuse, normal, etc.).
We also advise you to visually check the normal map after baking, as we've had instances where a well-looking normal map from Substance when baked again in Blender, gave a bad result. The solution was to replace the texture causing the issue in Substance.
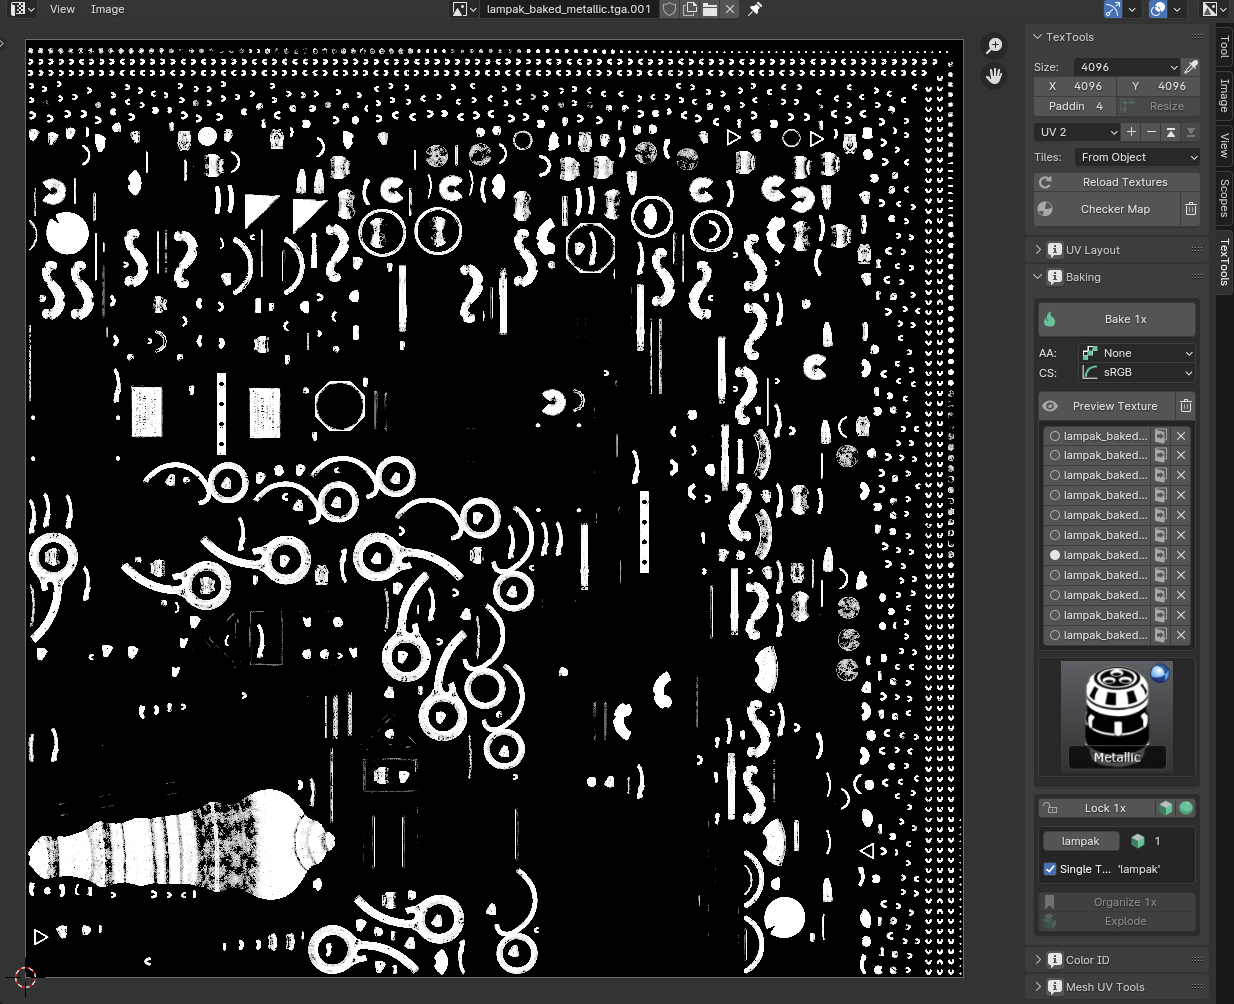
Once we check the normal map and find no problems with it, we move on to the roughness, after which we can consider the basic setup done. Then only the extras remain, such as metallic, emission. For these two examples, it's more problematic to use the basic Blender bake, so we call upon the TexTools add-on, with which we can bake both maps with a few clicks. In the case of alpha, it's not necessary to bake a separate alpha map because the diffuse map already contains alpha data, which we can utilize.
Once we have all the desired maps, we need to duplicate the merged object, and then delete all materials and the base UV which we used for baking. Then we create a new material, into which we connect the baked maps, and we are ready.
We can check individual maps in the same way: duplicate object, delete material slots, connecting nodes, but we must be careful to delete the duplicated test object after checking, so they don't accumulate and cause confusion or mistakenly bake the wrong thing in case of re-baking. It's best to delete after preview, and when everything is done, re-copy the final version. This way we can avoid confusion.
If everything is fine with the first group, then all we have to do is do the rest following the same steps.

If you're interested in the world of Blender, stay with us for our future blog posts!
Written and edited by: Cs. Krisztián
Translated to English by: F. Flóra