So, let's start from the very beginning. What is time-lapse, and why is it so exciting?
Time-lapse photography is a special technique where we create a video by sequencing together multiple photos. What does this mean exactly? A video, as we know, is a sequence of images that, when played back at a proper speed the viewer's brain perceives as continuous motion. This speed is typically at least 15 frames per second. The classic frame rates, or frames per second (fps), are usually 25 or 30, depending on whether you're working with European or American standards. Cameras work accordingly, capturing a certain number of frames per second, usually 25 or 30, depending on the settings. When we play these frames back at the same speed, we get a video at its original speed. However, what happens if we don't capture as many frames per second, let’s say just 1 frame per second? If we play these frames back at the same rate, we achieve a significant time compression.
One of the main reasons for the existence of time-lapse is to show things that are not normally visible to us in real-time due to the drastic acceleration of time. Another important aspect is thata single photograph has much higher resolution and dynamic range than an image captured by a video camera. So, we can achieve fantastic image quality even with entry-level cameras. My third argument for time-lapse is that it's just cool. Isn’t it? :)
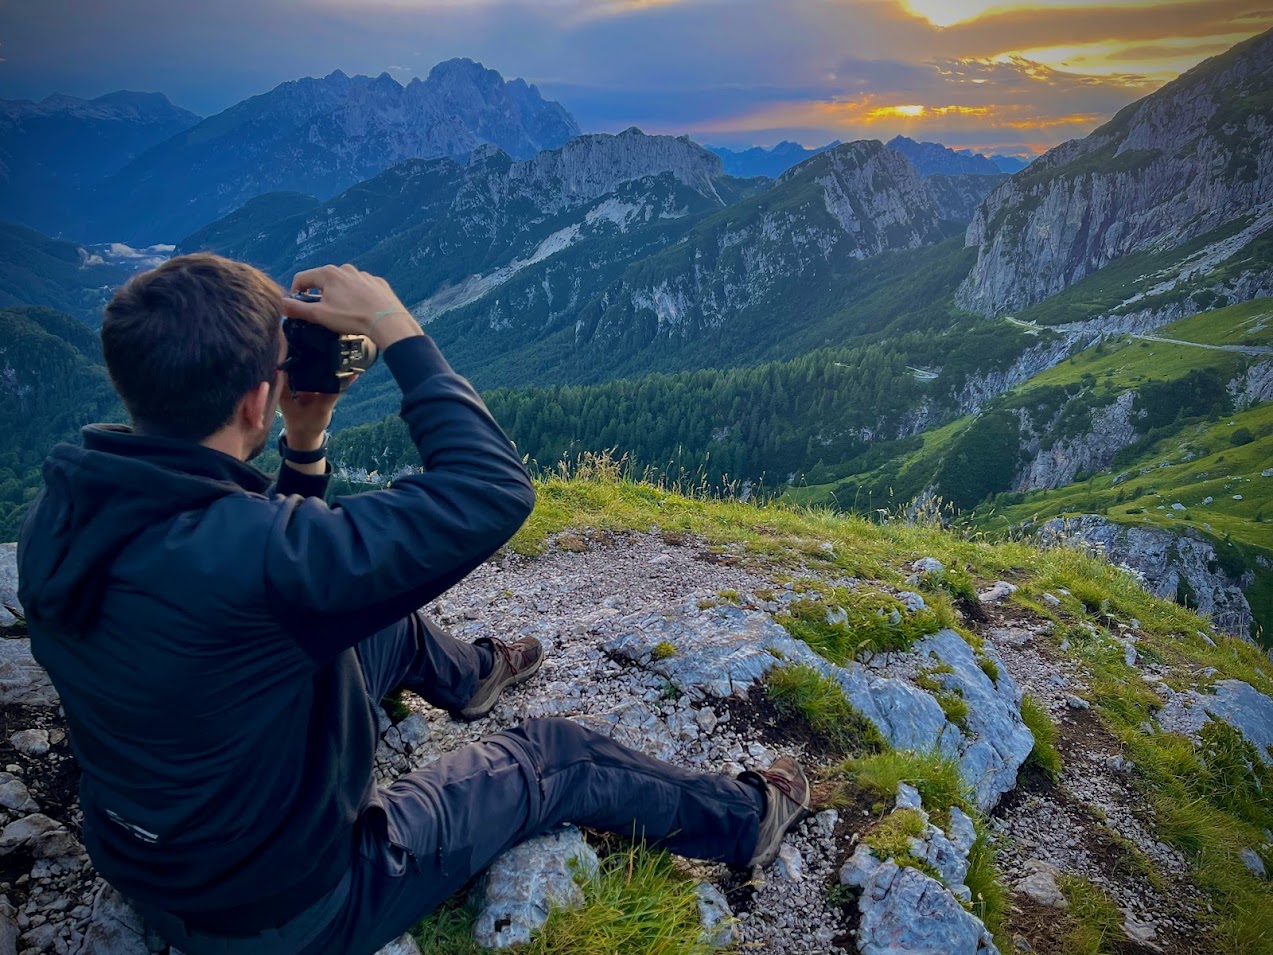
Nature time-lapses offer even more. I love being in nature. I hope that the recordings I create inspire others to connect with our planet, to understand the vast scale of nature's operations, and to realize how small we are, despite the significant damage we can cause. And the beauty is simply unparalleled. Waiting for time-lapses to finish forces me to see the landscape in a different way, to truly immerse myself, and it's a very special feeling.
Interval
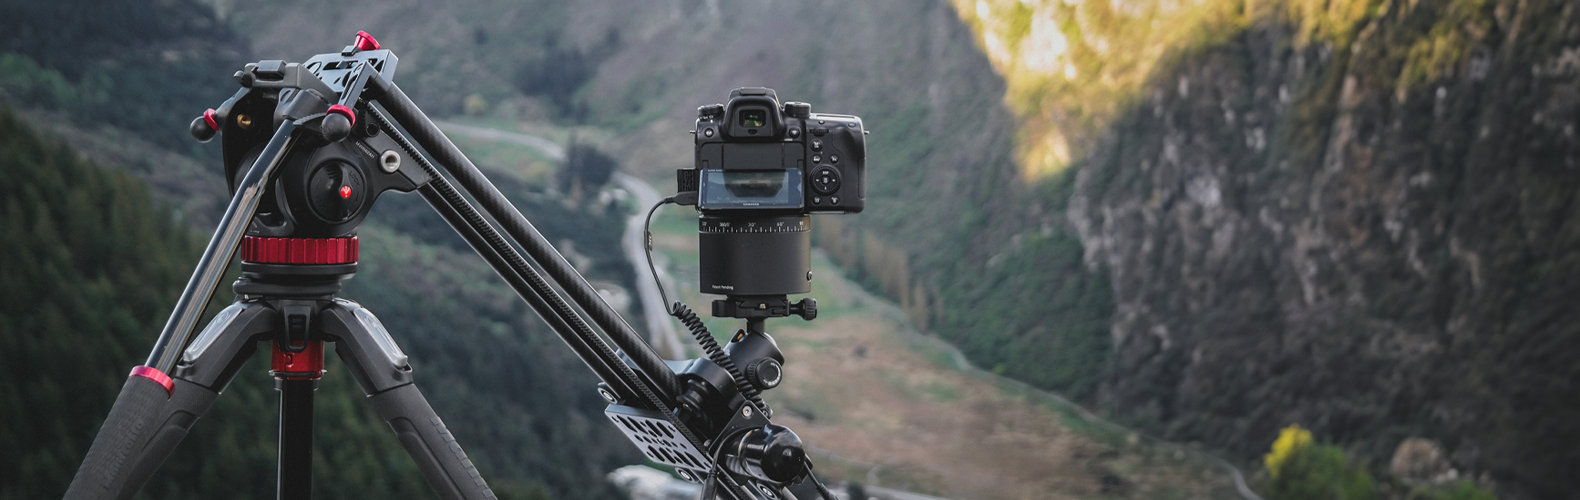
For the simplest time-lapse, you don't need much, just a device capable of capturing photos and a tripod. And of course, a timer, which can be either built into the camera or an external remote control. In the worst case, you can even use your hand :)
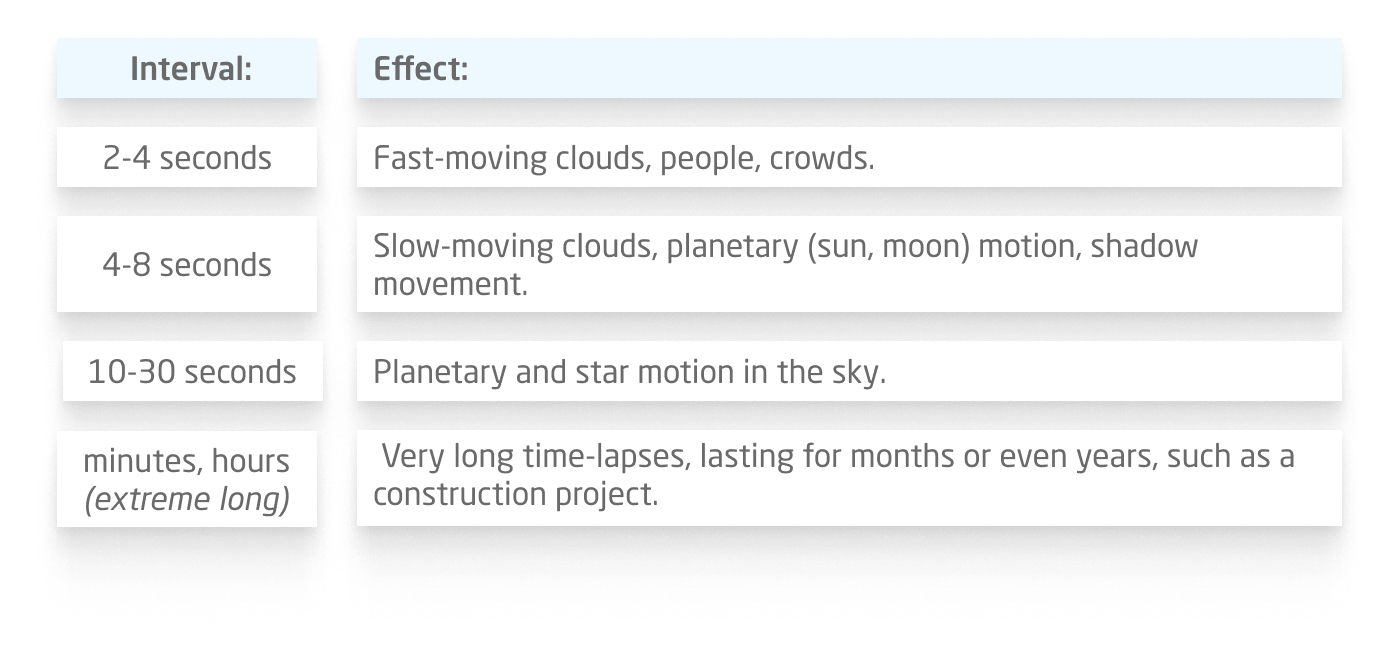
In Time-lapse it’s crucial how often you take photos. The time between two shots is called the interval and is usually measured in seconds. The larger this number, the more pronounced the time compression effect will be. Just think about it: if you take a photo every second and play them back at 25 frames per second, you'll achieve a 25x speed-up. In reality, you almost never take photos every second; usually, 2-3 seconds is the minimum interval I've ever used. Different intervals will result in different levels of speed ramping.
Let's look at some examples of different intervals:
 After some thinking, it becomes clear that the larger the interval, the longer you need to stay on location because more time is needed to gather each frame. If you want to play back 25 frames per second in the final video, you can calculate the interval based on this formula:
 This can be refined with the following general formula:
(interval + exposure time) fps final length = total time you spend capturing images, where fps * final length represents the number of frames. You need to know this because you should ensure you have enough space on your memory card.
This can be refined with the following general formula:
(interval + exposure time) fps final length = total time you spend capturing images, where fps * final length represents the number of frames. You need to know this because you should ensure you have enough space on your memory card.
So, you should consider these formulas:
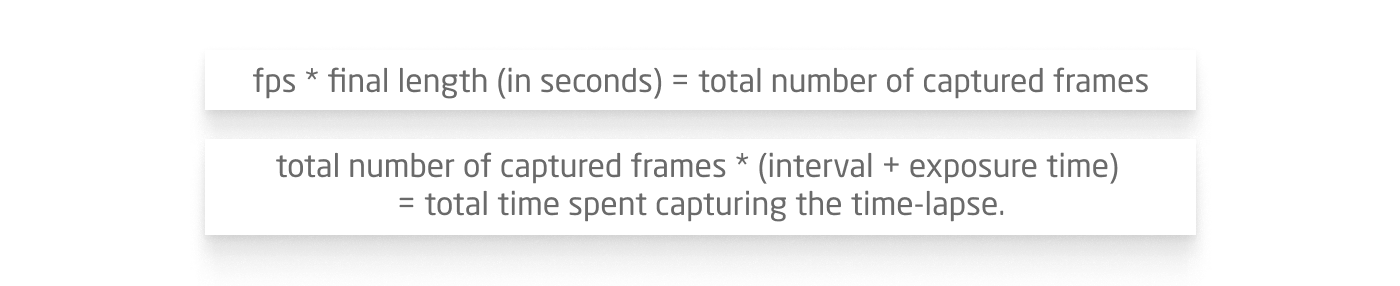 To simplify things most of the time you can count out exposure time as it’s gonna be less then a 100th second usually. So that makes our general rule very simple:
interval * total number of captured frames = total time you spend capturing the images.
To simplify things most of the time you can count out exposure time as it’s gonna be less then a 100th second usually. So that makes our general rule very simple:
interval * total number of captured frames = total time you spend capturing the images.
Sometimes you might need to calculate the interval backward if you have a fixed duration, say 10 minutes. In this case, you can use the above formulas to find the interval. For instance, if you need to capture 300 frames in 10 minutes with no exposure time (interval only), you can calculate it as follows: 300 * (interval + 0) = 600 seconds, so the interval can be a maximum of 2 seconds.
However, if you need to capture 5 seconds of playback time in 10 minutes at 25 fps: 25 5 (interval + 0) = 600 seconds, so the interval can be a maximum of 4.8 seconds. Since most devices operate in whole seconds, you would set it to 4 seconds.
At this point, it's essential to highlight that later in post-processing, you might find some flawed images or realize that a longer final clip would be better. I always capture more images than the minimum required because at this stage, I can usually afford it.
Technique
After all these calculations, let's take a practical example. I'll create a time-lapse of clouds using a phone and a camera.
This is the simplest form of time-lapse where the camera doesn't move, and all settings remain fixed throughout the time-lapse. Even with this, you can achieve fantastic results, and I still use it in certain situations. For telephoto shots or tight compositions, I always go for this method, and when I can't bring the entire setup to a location, I just take my camera and tripod to create time-lapses. Typically, I create two time-lapses simultaneously, and one of them is usually this static fixed-point setup.
With smartphones, you might not always have interval settings; instead, you often set the final duration or something similar, and the phone handles the rest.
For cameras, you either have a built-in time-lapse function or use an external intervalometer for exposures. Such a remote control is relatively cheap and can be obtained easily, just ensure it's compatible with your camera's port.
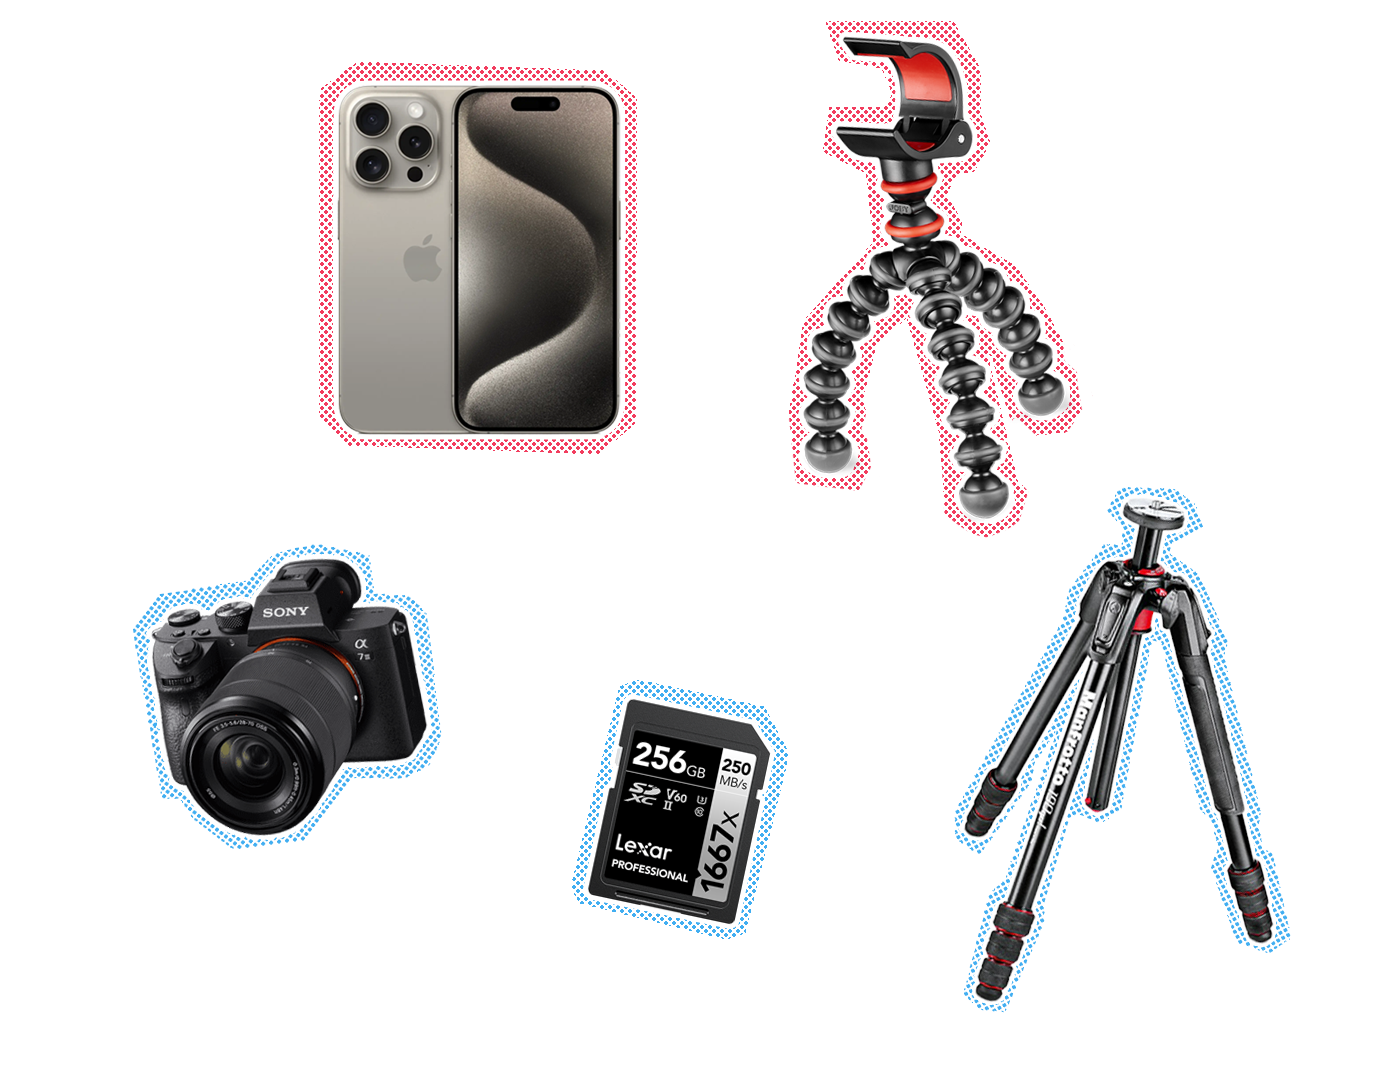 Product image sources: Apple, Joby, Sony, Lexar, Manfrotto
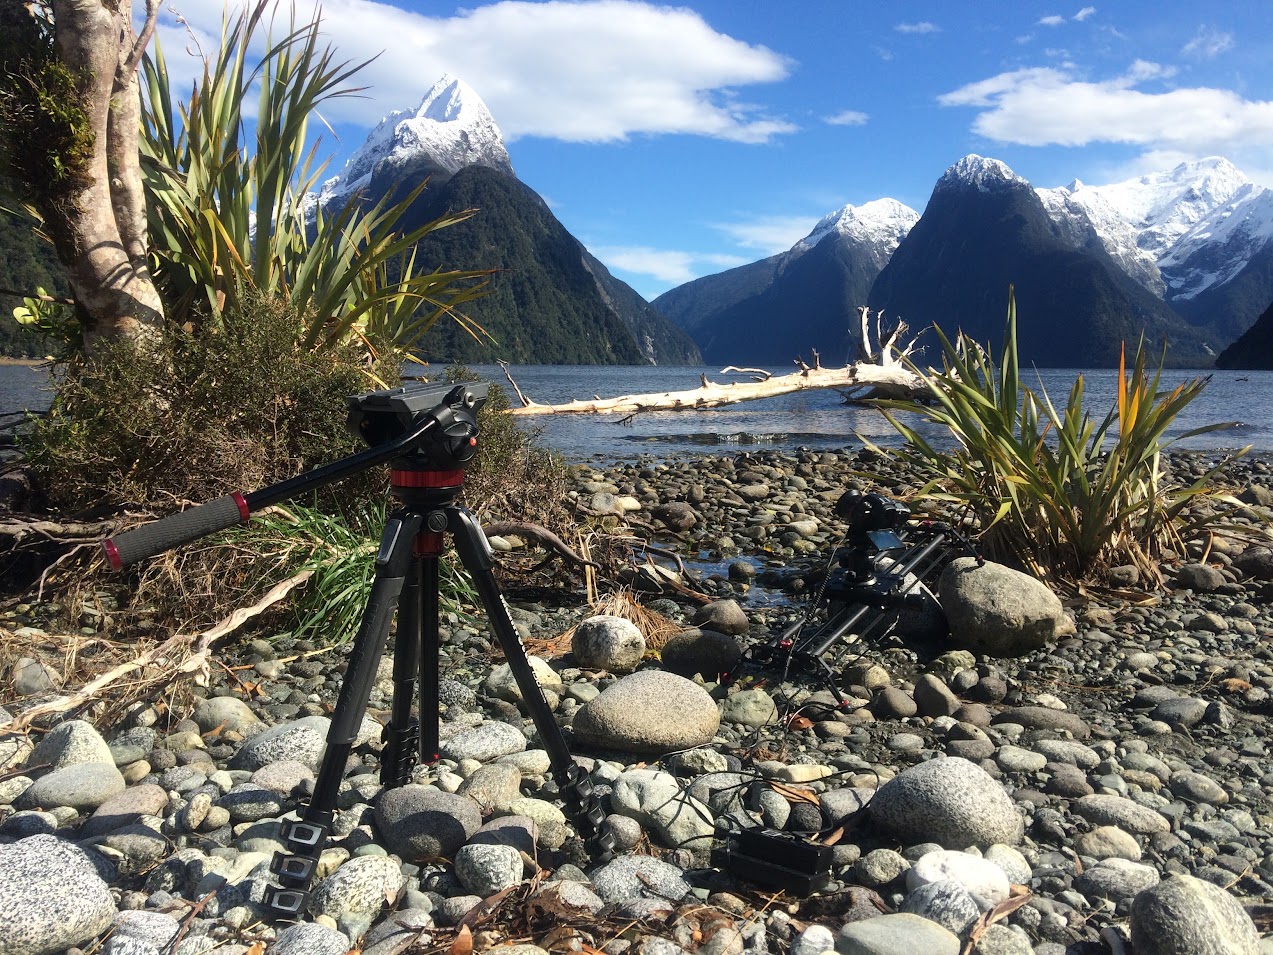
A stable tripod is crucial, as any minor movement can ruin your time-lapse; each frame should appear steady, without any shake. Minor imperfections can be corrected in post-processing, which we'll discuss later. Many say it's essential to have a good tripod, but I don't necessarily believe that; the key is to hold your equipment stable in some way. I actually created my first time-lapse using a 20euro telescope tripod. Later, I invested in better ones, but weight is a consideration when traveling, so don't get one that's too heavy. Most tripods have a hook at the bottom to add weight to prevent wind from pushing it over. I had the most extreme weather experience in New Zealand, where strong winds pushed my camera several times during a dawn time-lapse. Though it was expected, as I could barely open the van door and couldn't stand still due to the wind, it emphasized the importance of wind conditions.
So, once you have your tripod and equipment secured, compose your shot, set all the parameters, and then focus on the interval. In this case, we want to capture clouds, so I'll set a 4-second interval. Since the lighting and conditions aren't expected to change, there's no time limit. I want to create an 8-second video at 25 fps, which means I'll need 200 photos. With a 4-second interval, this will take 800 seconds, or 13 minutes and 20 seconds. Everything's set, but before I begin, I take one final test photo to ensure all settings are correct. All seems fine. I start the process. From this point onward, there's nothing left to do but wait for the time-lapse to finish and trust that nothing goes wrong.
Many times, I've doubted myself or my camera, stopping the process to double-check and restart. Do not do this! In most cases, you'll ruin an otherwise good time-lapse by stopping it prematurely. Make sure all settings are correct at the beginning, and if the camera is clicking away, it's likely everything is fine. This will be especially exciting when you experiment with various motorized systems, day-to-night transitions, and other complexities later on. But I'll keep repeating it: only stop the recording when it's done, or if you're 100% sure something is wrong, whether with the equipment, settings, or the subject (e.g., changing lighting conditions, the subject disappearing, etc.).
If, however, everything goes smoothly, and your first time-lapse is complete, it's time to go home and move on to post-processing! For smartphones, the phone usually takes care of this automatically.
This post was written by Márton Zsengellér, ZengoFilm Team Lead.