Shaders may seem like black magic to many, but if you dig deeper, you'll find that it's not so scary. There are two ways to create shaders in Unity. One option is to write one, and the other is to use a node-based visual tool, e.g., the Shader Graph. In this article, we will deal with the former.
We can create Shader assets in the Project window: Create → Shader. Here you can choose any option, you will get a file with the extension .shader, which you can modify with any code editor. To see the shader in action, we have to assign it to a material.
We can create the following types from shader assets:
- Surface Shader: We use it when we need to use lights when our shader must support Unity's light, shadow, light probe and lightmap system. In the surface shader, their support is already resolved through the use of painting models.
- Unlit Shader: If we don't need lights (e.g. special effects, hologram shader), then this type can be a good choice. By default, it does not interact with any of the light sources provided by Unity, if we need one, we have to program it ourselves, but that is probably not why we would choose Unlit Shader.
- Image Effect Shader: We create a post-processing effect (for example, a sepia effect or simulating night vision goggles). In its structure it is similar to the Unlit Shader.
- Compute Shader: calculates on GPU, apart from the usual render pipelines. They don't necessarily need to render, rather they perform computationally intensive tasks that the CPU can't necessarily handle quickly and efficiently. Compute shaders are very different from traditional shaders; we will not cover them in this article.
Let's see what a shader looks like in our code editor!
Shaders are declared in Unity using the so-called ShaderLab language. All parameters and properties of the shader are described in it, and it also contains the actual shader code blocks written in HLSL. A shader is defined by the keyword "Shader" and the following access path. The #CGPROGRAM and #ENDCG tags define the code blocks.
Now let’s compare the content of a Lit (Surface) and an Unlit Shader! You can see that the structure of the two shaders is very similar, they both consist of blocks with brackets.

Properties
Both shaders include a Properties section (although Lit uses a bit more variables). These are the variables that are public, so they appear in the Inspector, and we can change their value anytime. That is why we can give them names using apostrophes, which will be displayed in the GUI (Graphical User Interface). Do not omit the prefix '_'!
It is important to note that declaring variables only here is not enough. In order to be able to use them, we have to make the declaration within the #CGPROGRAM. Declaration is needed to link the two variables so the shader knows it's using the same data. In addition, the data type gets specified during the "second" declaration, which can be useful later in the optimisation.
The most frequently used variables are:
- Texture: _Variable name ("Display text", type: 2D) = "default color if no texture is specified. Usually it is "white"" {}
- Color: _Color("This is the name you will see", type: Color) = (1,1,1,1)
- Float: _Amplitude("Amplitude", Float) = 1
- Slider: _Transparency("Transparency", Range(min value: 0.0, max value: 0.5)) = default value: 0.25
SubShader
The SubShader(s) come after the Properties block. There can be several of these, depending on, for example, what we want to use on a mobile platform. When running Unity, in the shader, it selects and uses the first SubShader in line that is compatible with the given platform. So, within a shader, only the content of one subshader is executed.
SubShader Tags
Whether we have one or more SubShaders, we can add different tags to each of them. These key-value data pairs provide information about what and how to render. Let's take a look at some examples without claiming to be exhaustive.
Their syntax is: Tags { “[name1]” = “[value1]” “[name2]” = “[value2]”}
- RenderPipeline: UniversalRenderPipeline, HighDefinitionRenderPipeline, other defined pipeline
- Queue: defines the rendering sequence (we can overwrite this in the material settings by rewriting the value of Render Queue)
- Background: this is rendered first (e.g. skyboxes or a color)
- Geometry: we use this for most objects, Opaque uses this (see below)
- Alpha body
- Transparent: glass, particle effects
- Overlay: used for effects, everything that gets rendered on top, e.g. lens flare, UI parts, HUD (head-up display)
- RenderType:
- Opaque
- Transparent
- TransparentCutout
- Background
- Overlay
Pass Tags
These tags can be placed under Pass using the same syntax. Such tags are, for example
- LightMode
- PassFlags (can only be used in forward rendering mode and when we use ForwardBase lightmode. Unity only transfers the data of the main directional light and ambient light/light probes to the shader).
If we want a transparent shader, it is not enough to set the above. Unity - Manual: ShaderLab command: Blend (unity3d.com)
Pragma
Here we describe the shader what "functions" we will have and how the compiler should handle them, a kind of preprocessing directive. Surface shaders will always have a #pragma surface surfaceFunction lightModel [optionalparams] (as you can see in the example above).
If we rewrite the fullforwardshadows parameter to noshadow, then we can see that it will not receive shadows from the meshes (objects) around it, even if "Receive Shadows" is turned on in the Mesh Renderer.

“lightModel” specifies which lighting model to use. The already existing ones are "Standard", "StandardSpecular", "Lambert", "Blinn Phong", or we can even write one if the existing ones do not meet our requirements.
We can declare these functions as follows:
- half4 LightingName (SurfaceOutput s, half3 lightDir, half atten){} We use this for forward rendering when we don't need the view direction*
- half4 LightingName (SurfaceOutput s, half3 lightDir, half3 viewDir, half atten){} We use this in forward rendering when we need the view direction*
- half4 LightingName_PrePass (SurfaceOutput s, half4 light){} When we use deferred rendering for the project
*This is the vector from the vertex or fragment to the camera
Since Unlit Shaders do not handle lights by default, there are vertex and fragment directives implemented. The vertex program processes the mesh vertex data, and the fragment is responsible for the final color of the pixels. However, these functions have to work with some kind of data, which is why structs are needed. The vertex function will run first, so it receives appdata as input. The fragment then works with it (that is why the vertex function has a return value of v2f - vertex to fragment).
Shader asset examples
Let's look at a really popular "toon" shader. The first version is an Unlit, and then the same implemented as a Surface Shader. The length and complexity of the unlit version clearly illustrates that adding a supporting light in an unlit shader is a lengthy task, and the advantage of the Surface shader thus stands out.
Shader "ShaderTutorial/ToonShader"
{
        // We declare the necessary variables here
        Properties
        {
        // Color (tint)
        _Color ("Color", Color) = (1,1,1,1)
        // Texture (optional )
        _MainTex("Main Texture", 2D) = "white" {}
        // Ambient light with HDR properties
        [HDR]
        _AmbientColor("Ambient Color", Color) = (0.4,0.4,0.4,1)
        // Color of specular light reflection
        [HDR]
        _SpecularColor("Specular Color", Color) = (0.9,0.9,0.9,1)
        // Setting the brightness value
        _Glossiness("Glossiness", Float) = 32
        // Rim color on the illuminated parts - highlights the silhouette where the light hits the model
        [HDR]
        _RimColor("Rim Color", Color) = (1,1,1,1)
        _RimAmount("Rim Amount", Range(0, 1)) = 0.716
        _RimThreshold("Rim Threshold", Range(0, 1)) = 0.1
        }

    SubShader
    {
        // Level of detail
        LOD 200
        // This is a Pass. We can use more than one with Unlit shaders.
        Pass{
                Tags{
                // Only uses the directional light and ambient/light probes
                "LightMode" = "ForwardBase"
                // We receive the necessary data.
                "PassFlags" = "OnlyDirectional"
                }
                CGPROGRAM
                #pragma vertex vert                     // Vertex fgv
                #pragma fragment frag                   // Fragment fgv
                #pragma multi_compile_fwdbase
                // We need it because of ForwardBase.

                // A set of predefined supplementary variables and functions.
                #include "UnityCG.cginc"
                #include "Lighting.cginc"
                #include "AutoLight.cginc"

                sampler2D _MainTex;

                // The data in appdata is automatically available.
                struct appdata
                {
                    float4 vertex : POSITION;           // Local space
                    float4 uv : TEXCOORD0;
                    float3 normal : NORMAL;
                };

                // However, we have to manually upload the data here
                struct v2f
                {
                    // Here we get the normal vector data of our object
                    float3 worldNormal : NORMAL;
                    // Here this is already a screen-space position.
                    float4 pos : SV_POSITION;
                    float2 uv : TEXCOORD0;
                    // We store the result of WorldSpaceViewDir here.
                    float3 viewDir : TEXCOORD1;
                    // We put the data regarding shadow into a TEXCOORD2
                    // AutoLight.cginc)
                    SHADOW_COORDS(2)
                 };

                v2f vert (appdata v)
                {
                    // We create a new v2f struct
                    v2f o;
                    // Place the vertex position in clip-space
                    o.pos = UnityObjectToClipPos(v.vertex);
                    // Convert the normal vector to World-space from Object space, because our directional light is contained there too
                    o.worldNormal = UnityObjectToWorldNormal(v.normal);
                    // We get the direction of WorldSpace
                    o.viewDir = WorldSpaceViewDir(v.vertex);
                    //We store the vertex space in the shadowmap space in the declared SHADOW_COORDS(2).
                    TRANSFER_SHADOW(o)
                    // We pass this to the fragment function
                    return o;
                }

                float4 _Color;
                float4 _AmbientColor;
                float _Glossiness;
                float4 _SpecularColor;
                float4 _RimColor;
                float _RimAmount;
                float _RimThreshold;

                //SV_Target used by DX10+ , COLOR used by DX9.
                //SV_Target is more universal
                float4 frag (v2f i) : SV_Target
                {
                    float3 normal = normalise(i.worldNormal);
                    //We use the dot function to see when light falls on our object //by comparing the directionla light with the normal vector.
                    //The dot returns a float value (a vector of length) between -1 and 1. The value is 1, if the //directions of the two vectors are parallel to eachother, -1 if they face opposite //directions, and 0 if they are perpendicular to each other.
                    float NdotL = dot(_WorldSpaceLightPos0, normal);

                    // We get this macro from the AutoLight.cginc.
                    // If the shadow is 1.0 = fully lit, if 0.0 = fully in the shadow
                    float shadow = SHADOW_ATTENUATION(i);

                    // There is smoother "blur" between dark and light parts.
                    //Returns 0 and 1 depending on whether the third parameter is less than or greater than the lower or upper bound.
                    float lightIntensity = smoothstep(0, 0.01, NdotL * shadow);
                    // We get _LightColor0 from "Lighting.cginc", is the color of the directional light
                    float4 light = lightIntensity * _LightColor0;

                    // Calculation of specular reflection based on the Bling-Phong model: We need the bisector vector of the viewing and illumination directions.
                    //With NdotH, we use the dot again to calculate the strength of the reflection, i.e. whether we can see the reflection from the given viewing direction.
                    float3 viewDir = normalize(i.viewDir);
                    // The result of WorldSpaceViewDir is not normalized
                    float3 halfVector = normalize(_WorldSpaceLightPos0 + viewDir);
                    float NdotH = dot(normal, halfVector);
                    // The lightIntensity is needed so that there is reflection only where light hits the object.
                    // _Glossiness * _Glossiness is needed so that we don't have to enter a large value in the inspector.
                    float specularIntensity = pow(NdotH * lightIntensity, _Glossiness * _Glossiness);
                    // Like before, we separate it into light and dark parts.
                    float specularIntensitySmooth = smoothstep(0.005, 0.01, specularIntensity);
                    // We define the color of the reflections.
                    float4 specular = specularIntensitySmooth * _SpecularColor;

                    // Rim light
                    // By subtracting the dot from 1, we invert the value. Because of the silhouette effect, we will need those parts that are located further away from the camera.
                    float4 rimDot = 1 - dot(viewDir, normal);

                    // rimIntensity will be responsible for having a rim on the illuminated parts, and also how much surface area the rim occupies on this illuminated part.
                    float rimIntensity = rimDot * pow(NdotL, _RimThreshold);
                    rimIntensity = smoothstep(_RimAmount - 0.01, _RimAmount + 0.01, rimIntensity);
                    // Defining the color like before
                    float4 rim = rimIntensity * _RimColor;

                    // Using the data of the UV and texture we define the colors of the pixels.
                    float4 sample = tex2D(_MainTex, i.uv);

                    // Finally, we add these extra values and multiply by texture and base color.
                    return (light + _AmbientColor + specular + rim) * _Color * sample;
                } // Closing Frag
            ENDCG
        }   // Closing Pass

        // Using UsePass we use the Pass of a different shader for our own.
        UsePass "Legacy Shaders/VertexLit/SHADOWCASTER"
    }   //Closing SubShader
    FallBack "Diffuse"
}
The following code implements the same, but as a Surface Shader. We can see that instead of structs and methods, all operations are made in the declared light model. In addition, we do not need conversion operations as most data (for example lightDir, viewDir) is immediately available.

Shader "ShaderTutorial/ToonShaderSurface"
{
    Properties
    {
        _Color ("Color", Color) = (1,1,1,1)
        [HDR]
        _SpecColor ("SpecularColor", Color) = (1,1,1,1)
        [HDR]
        _AmbientColor ("AmbientColor", Color) = (1,1,1,1)
        _MainTex ("Albedo (RGB)", 2D) = "white" {}
        _Glossiness("Glossiness", Float) = 32
        [HDR]
        _RimColor("Rim Color", Color) = (1,1,1,1)
        _RimAmount("Rim Amount", Range(0, 1)) = 0.716
        _RimThreshold("Rim Threshold", Range(0, 1)) = 0.1
    }
    SubShader
    {
        Tags { "RenderType"="Opaque" }
        LOD 200

        CGPROGRAM
        #pragma surface surf BasicDiffuse fullforwardshadows

        #pragma target 3.0

        sampler2D _MainTex;

        struct Input
        {
            float2 uv_MainTex;
            float3 viewDir;
            fixed3 lightDir;
        };

        half _Glossiness;
        fixed4 _Color;
        fixed4 _AmbientColor;
        fixed4 _RimColor;
        float _RimAmount;
        float _RimThreshold;

        inline float4 LightingBasicDiffuse (SurfaceOutput s, fixed3 lightDir, half3 viewDir, fixed atten)
        {
            float difLight = dot (s.Normal, lightDir);
            float normDifLight = normalize(difLight);
            float NdotL = dot(lightDir, normDifLight);
            float lightIntensity = smoothstep(0, 0.01, NdotL * atten);
            float4 light = lightIntensity * _LightColor0;

            //Specular
            float3 halfVector = normalize(lightDir + viewDir);
            float NdotH = dot(s.Normal, halfVector);
            float spec = pow(NdotH, _Glossiness * _Glossiness);
            float specSmooth = smoothstep(0.005, 0.01, spec);

        // Rim
            float4 rimDot = 1 - dot(viewDir, s.Normal);
            float rimIntensity = rimDot * pow(NdotL, _RimThreshold);
            rimIntensity = smoothstep(_RimAmount - 0.01, _RimAmount + 0.01, rimIntensity);
            float4 rim = rimIntensity * _RimColor;

            float4 col;
            col.rgb = ((specSmooth * _SpecColor) + rim + light) * _Color ;
            col.a = s.Alpha;

            return col;
        }

        UNITY_INSTANCING_BUFFER_START(Props)
        UNITY_INSTANCING_BUFFER_END(Props)

        void surf (Input IN, inout SurfaceOutput o)
        {
            fixed4 c = tex2D (_MainTex, IN.uv_MainTex) * _Color;
            o.Albedo = c.rgb   * _AmbientColor;
            o.Alpha = c.a;
        }
        ENDCG
    }
    Fallback "Diffuse"
}
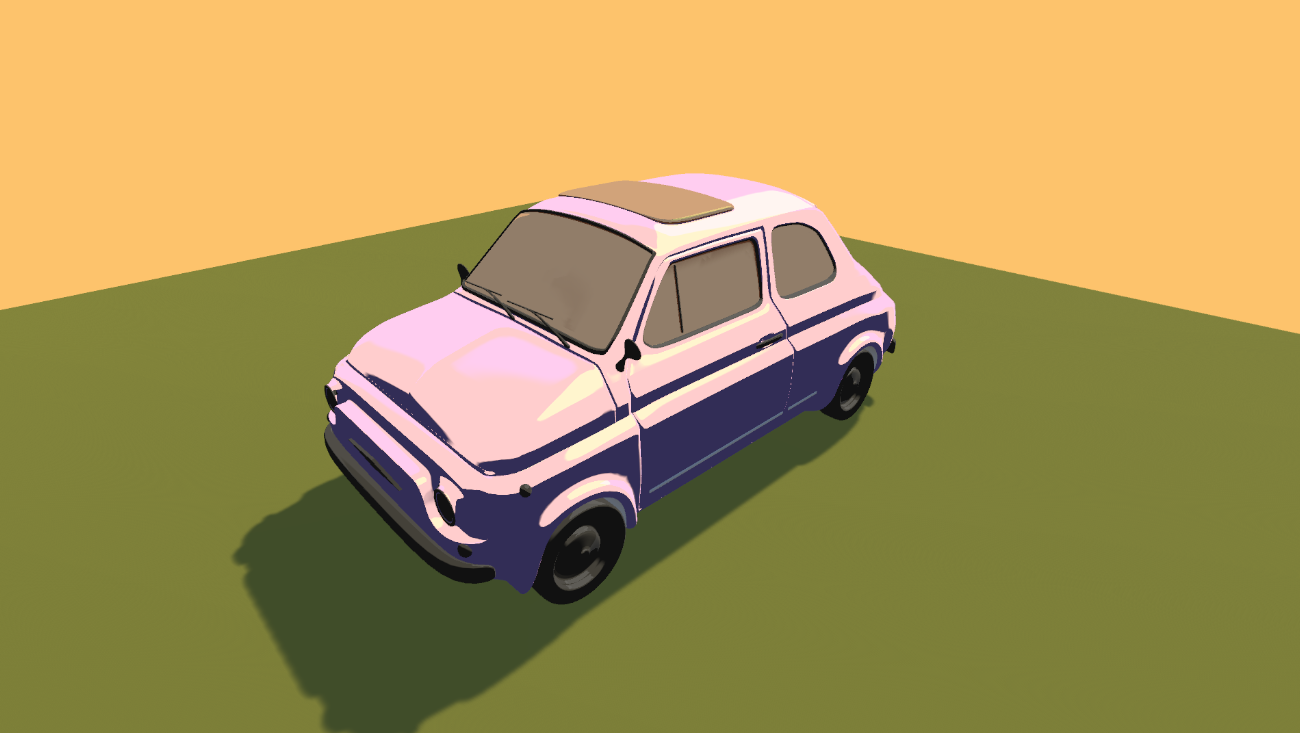
The above shaders can be expanded to our liking, according to our needs. For example, our Unlit Shader currently only considers directional light. However, by adding an extra pass and the right tag, spot lights can also affect our little car.
It's worth experimenting, as you can even accidentally create a shader with a unique style.
This article was written using Unity version 27.3.2021.
This article was written by M. Tamara and translated by F. Flóra.